Saturday, May 15, 2010

Maple Paddle

After a few months off from canoe building I have started a new small project to get back into it. The maple paddle is being made from a 7/8" light-coloured maple board with strips of dark mahogony laminated on the shaft and handle to make them at least 1-1/4" thick. I picked up the wood from Minton's hardware in Mountain View, which after more than 100 years in business will be closing soon. While the scrap pieces of Mahogony cost a total of 25 cents, the two 5'-6" maple boards came to $100! (The guy who cut them to length for me asked "Have you checked out how much it costs to just buy a paddle from West Marine??") It sure is beautiful wood though. I was debating whether to get a thicker poplar board that wouldn't have required laminating, but I was sold on the look of the maple. I don't have real measurements from the wood I was looking at, but the Wood Engineering Handbook (see sidebar) has properties for Sugar (hard) Maple and Yellow Poplar.

So, while Maple is 1.50 times heavier than poplar, it has 1.55 times the bending strength. Of course these are only estimates as wood properties can vary from tree to tree and depending on where in the tree the wood came from. The upshot is that I should make the paddle blade relatively thin to reduce weight, but this should not compromise on strength. Unfortunately the shaft cannot be made too thin as it needs to feel comfortable in the hand. Looking at the work to failure for the two woods in the above table, it looks like Maple is considerably tougher.
Because Maple is such a hard wood, it is also difficult to work with hand tools. I found this today as I began planing the paddle blade. I initially had the edge of my block plane ground to 30 degrees, but it had difficulty biting the wood. I reground the edge at 25 degrees and found it much better. The hard Maple requires that I resharpen the plane edge frequently.

Thursday, May 13, 2010

Ahjumawi

Ahjumawi Lava Springs State Park lies in the Northeast corner of California, about 50 miles East of Redding on Hwy 299. Among its claims are "most remote" and "least visited" state park in California and the "largest system of fresh-water springs" in the country. "Most remote" is relative - it is maybe if you're coming from the Bay Area or SoCal, but certainly not if you live in McArthur, which is 3 miles away. It may be the "least visited", probably because you can only access the campsites by boat, but when we arrived at the launch there were a couple dozen folks bringing in their motorboats after a morning spin on the lakes.The most common description of the park on the internet is "exceptional, even primeval, beauty", which seems to have been copied from the park website. (see side bar)

The primeval beauty didn't strike us at first as we launched from the "Rat Farm" with clouds obscuring views of the peaks, but by the next day I agreed with the description. The lava springs are unique in my experience with cool clear water flowing from the porous lava rock by Ja-she Creek to feed the lakes.
The campsites are relatively close to the launch so, hoping to get in a little more paddling, we headed off downwind to paddle around Big Lake, knowing we'd have to battle to get back. Big Lake wasn't named Huge Lake for a reason, but there is a good hour of paddling to get around it. As if on cue, the breeze picked up and threatened rain as soon as we pointed our bow back upwind. We were rewarded with some great views of Mt. Shasta peaking through the clouds in the distance though. Passing back by the Rat Farm we entered Horr Pond to see that another group had already claimed the first campground. There are actually 3 sites at each campground, but we decided to keep fighting the wind to get a campground all to ourselves.


Being one of the least visited state parks, there is not a lot of information on it to be found and the best map to be found was the simple outline of the lakes that I printed from the park website. Comparing the map to a Google Earth view when we got back home, we found that the map must be quite out-of-date, and for that reason it took us a while to find the Crystal Springs and Ja-she Creek sites. See the comparison above. It appears that a levy holding back the Tule River breached flooding the peninsula between Horr Pond and the river. It actually creates a much larger area to explore by canoe.
We eventually happened upon the Ja-she Creek campsites and set-up there for two nights without seeing any other people for the rest of the weekend. The day after arriving we hiked about 9 miles on the park trails to see the volcanic splatter cones, depressions and lava tubes. Definitely worth the trip!

If you're visiting the park and looking for something to eat on the way in or out check out 'Hal & Kathy's Cook House' in Fall River Mills. It's great! We found it on our drive out after a pack-up and paddle out in the rain.

Burney Falls is worth the side trip.

Friday, September 11, 2009

Back to Spicer!

This time with Scott's parents. Our favorite campsite was free again, even on Labor Day weekend! Nice weather as usual, and we saw a mama bear with her two cubs up a tree - very cute.

See how much the water level has dropped over the past few weeks?


Sunday, July 19, 2009

First Trip: Spicer Meadow Reservoir


Two posts today since I didn't get around to posting last weekend about the launch. Read below.
This weekend Tracy and I took the canoe up to Spicer Meadow Reservoir. Its a 6 mile long reservoir at 6500 ft off hwy 4, partly in the Carson-Iceberg Wilderness. I think it is the closest thing California has to a long distance lake trip. The scenery was beautiful and motor boats are limited to trolling motors in the lower half of the lake. We paddled out to the end in about an hour and a half of leisurely paddling and set up camp on a granite hilltop rising out of the water. You get some unique rock formations by the water's edge that you don't normally see in a natural lake. There were a few hazards for the as yet unblemished underside of Thistle, namely numerous submerged and partly submerged pine trees from before the reservoir was flooded. Some of the tops were sitting just a few inches below the surface. Thanks to Tracy's superior navigating skills we got through unscathed. The water was clear down to 20-30 ft and a perfect swimming temperature. Fish were jumping all over the place. Have to bring a rod next time.

Launching


She floats!

Last weekend lots of friends came down to Shoreline Lake in Mountain View with us to launch Thistle for the first time. After putting up with the jokes about what IKEA kit I used, the champagne flowed and she took to the water like, well like a canoe. I don't think I've ever seen it rain here in July, but it was threatening last weekend. In the end there were only a few drops and a few of got to test out the boat. Dan and Jen and little Henrik were there. Pete and Ayse and little Selim were there. Adam and Emily made it down. Catelyn and Andy and little Everett were there and Tracy and me. Nate and Steph and Jude didn't make it for the launch, but came over later to drink some beers.

Sunday, June 28, 2009

Thistle

June 28, 2009. She's done. Its 95 degrees F today. A hot day for working, but worth it as I finished Thistle today. All that was left to do was install the seats and thwart and take some photos. Now I'm sitting on the back patio with a beer. ahhh. Its a bit unbelievable to me that I am done building. It was hard to imagine ever finishing at times. Now I'm just looking forward to getting up on a mountain lake. Lots of people helped me out along the way. Thanks to John Mould for lending me so many tools - sometimes for months at a time. Thanks to Andy Orsini without whose help I never would have been able to machine the red cedar strips from full boards or cut the gunwales. Thanks to our great (former) neighbours, Ben and Nicole, who never complained once about me taking over our shared garage. I really wanted to finish before they left, but I missed by a week. At least they only moved a few doors down! Thanks to my parents for getting me started with gift certificates to Home Depot. And most importantly thanks to Tracy for letting me disappear for hours into the garage for a year and half and also for helping me with the worst tasks (epoxying).
So after taking a lot of photos we conducted the inaugural weigh-in. And she weighs .... 55 lbs! A little heavier than my initial goal of 50 lbs, but really not too bad. I think I can portage her for a kilometre perhaps. I was afraid she'd be over 60 lbs near the end.
It will be a couple weeks before we get her in the water as we're heading home to Ontario for the long weekend coming up. I think the launch party will be the weekend after.
So, thats it. Welcome to Doneville, population me.


Saturday, June 27, 2009

Penultimate Update


Varnishing is the least enjoyable process in the canoe build, but produces the most satisfaction. It is a constant battle against the forces of dust, fumes and drips. Dust is everywhere and I became obsessive about removing every last speck. That is a difficult thing to do when working in the garage of an old house, especially while Ben and Nicole (the other half of our duplex) are moving out. I swept and vacuumed repeatedly, including the walls and ceilings and the driveway outside. After sanding coats I would vacuum the hull and wash it with a wet towel and wipe it down with a dry one. Then before a new coat I would wipe it down again and then go over it a couple times with a tack cloth to remove the final specks. While applying a coat I would lower the garage door to about a foot from the ground and stuff plastic sheeting in the cracks between the panels to prevent dust from entering. Even doing this I had to wait until 8pm at night when the wind died down to keep dust from blowing in. Mostly closing the garage door brings up the next evil: fumes. An hour of leaning over the freshly spread varnish for an hour in the closed space could make me loopy in a hurry. I pilfered a desktop fan from work to exhaust air under the garage door for the first coat. Air could flow in over the top. This helped, but I grabbed a second fan from work for the final five coats and the two fans on high prevented me from getting high instead. The last scourge of canoe varnishing is drips or runs in the varnish. I found that the varnish would spread on nicely and evenly with no sign of drips until the coat began to skin over on the surface. Somehow at this stage it could still flow underneath and I'd get these wide sagging drips around the turn of the bilge. By the time these were apparent though, it was too late to do anything about it since the varnish was already half dried. The only way to prevent it was to ensure a thin coat to begin with. The badger hair brush was definitely the nicest brush I have used (it doesn't shed at all), but in the end I found it was easier to get a thin, even coat with the 99 cent foam brushes (and I didn't have to clean them!). Warmer temperatures also seemed to help because the coat would set quicker.
Well last night I finished the last of 3 interior coats and 3 exterior coats and I'm glad its over. The results will speak for themselves. Tomorrow I plan to wrap this project up - installing the seats and thwart and taking the victorious final photos! My Mom brought us a bottle of fine Champagne a couple weeks ago and I can't wait to pop the cork.

Tuesday, May 26, 2009

Badger hair


Decks, check. Gunwales, check.

Took advantage of the Memorial Day long weekend to not spend all my days off working on the boat, so Tracy and I spent Saturday hiking at Point Reyes. After picking up some Red Hawk cheese from the Cowgirl Creamery we found a new 12 mile loop starting at Muddy Hollow off of Limantour Rd on some trails we haven't been on before. Great spot - for a holiday weekend we only saw three other groups of people the whole time. We climbed up through a tunnel of trees to the top of Pt. Reyes Hill at 1300' for a good view over Tomales Bay and then headed back down near Drake's Estero past a wary group of cattle and over close to Limantour Spit before heading back to the car.
Sunday I finished trimming the trim and sanding the decks and I installed a "handle" made from a leftover piece of ash outwale spanning between the sides of the hull under each deck to reinforce them. They don't add much weight, but make the decks stronger and look stylish to boot.
On Monday I fit the seats, but didn't fully install them. That will be the very last thing after I'm done varnishing. I used the suggested seat jig recommended by Canoecraft. As usual with their recommendations, it worked.
I picked up everything I need for varnishing from West Marine as well. I went with the Epifanes high-gloss clear spar varnish. Its the best stuff out there with a price to match. And I picked up a badger hair brush. Who knew badger hair was the perfect thing for applying varnish?? Apparently it is.
Since it takes at least a day for each coat of varnish it doesn't look like I'm going to get the boat water ready for my Mom and sister's visit next week. But at least they'll be able to see it in pretty much it's finished form.
Next up is another cleaning and thorough dedusting of the garage before I varnish.

Sunday, May 10, 2009

On Deck


Just in case anyone actually reads these posts, I figured I better update my progress since I've been pretty silent recently. I know I have at lease one reader (thanks Ayse! You'll have to make it down to the South Bay to see it when I'm done.).
Since I found out that my Mom and sister and little nephew, Michael, are coming out to visit the first weekend of June I have made that my deadline for getting the canoe in the water! It's going to be tight but I know how much Michael likes boats (or "boaps") so I don't want to disappoint.
After getting both inwales installed in April I have been working on the decks. I epoxied a strip of white Port Orford Cedar between two thick boards of Western Red, then cut and planed the edges of the resulting inch thick board to fit the bow and stern. I then spent a fair bit of time scraping and sanding out the curved shape of the shear line into the decks so that they are slightly concave. Yesterday these were epoxied into position and also fastened with 1-1/2" stainless steel screws. There is still a bit of sanding to do to get the decks completely flush with the gunwales.
Today I am on to the last piece of the boat that I actually have to make! I planed the taper into both ends of one outwale and still need to do the other one before epoxying them in place. After that I just have to fit the seats and yoke (which I bought) (for now - maybe next year I'll make my own??) and then its final sanding and 3 or 4 coats of varnish inside and out.
I'm starting to think about where Tracy and I can take the boat here in California. There aren't too many (any?) lake chains in California, but there are some beautiful little mountain lakes in the Sierra that I might be able to get on. I ordered the book: Canoeing The California Highlands: A Quiet Water Guide To Paddler's Paradise. Can't wait till it gets here.

Sunday, April 12, 2009

The Trim, Part II


It might be taking a little longer than I originally thought it would, but bit by bit the canoe is nearing completion. In the last three weekends Tracy and I put on the final coat of epoxy on the inside of the hull. It looks pretty good, with just a bit of the fibreglass weave providing a pebbled surface for some traction. I think I finally got my squeegee technique down on the last coat and it won't need any real sanding before applying the varnish.

I spent quite a bit of time planing the tapers into the inwales and cutting and fitting them to length to fit precisely in the boat. Yesterday and today I epoxied them on with Tracy's help. As with most things on the boat, it worked out pretty well with only a couple minor problems that probably only I will notice. I bought three more clamps on Saturday morning before I put the starboard gunwale on, but found I could have used even more to get the inwale on as snug as possible. I ended up using a couple homemade clamps to get the job done and today I went out and bought 4 more clamps before putting on the port side. It's true that you can never have too many clamps. I'll put in some 1/2" stainless screws for extra strength too before I put on the outwales.

Sunday, March 1, 2009

The Trim

It's pouring rain this Sunday afternoon so I'm catching up on the documentation instead of working on the canoe. With the hull mostly finished it is time to work on the trim. I knew what I wanted for the gunwales, but I couldn't get it done by myself in the garage so I drew up some plans, emailed them to Andy and recruited his help to get them done. I always learn a lot working with Andy as he shows me lots of woodworking tricks. He follows the mantra of spending a little extra time building a good jig will get the job done right and save time in the end.


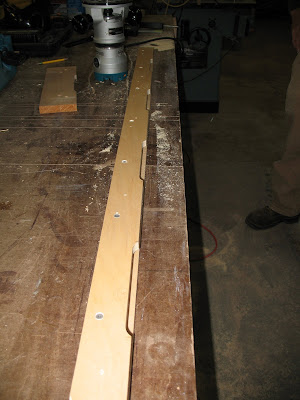
The gunwales are made up of an inwale and an outwale on each side of the boat. A fair bit of milling was needed to shape them how I wanted. The inwale and outwale are each nominally 3/4" x 3/4", but I added a slight bevel on the side that attaches to the hull. There is a little bit of tumblehome (curving inwards) of the shear line at the middle of the boat so the bevel should help make the top of the gunwales horizontal instead of slanted. I will have to plane off the bevel towards the stems where the sides of the boat are almost vertical. We also beveled the bottom of the outwale to make it a little more elegant and lighter and rounded off the outside corners of both inwale and outwale. There are eight 6" scuppers on 12" centers on the inwale. Since I could only find 13' long ash boards we also cut scarf joints on the ends of the strips to join another 4' long piece on each. Andy constructed a sled jig for the table saw that made these joints perfectly. It can be seen in the photo with Andy. To cut the scuppers we used a router and made a jig to hold the inwale and cut four identical scuppers at a time spaced the correct distance apart. This jig was simply two flat strips of wood spaced 3/4" apart with another strip of wood that positioned the inwale in the right location when it was all screwed together. The top strip had the scupper forms cut into it for the router bit to follow. Andy also likes to make extra copies of everything so now I have three sets of gunwales! I guess I'll use the best ones for now and keep the other two for my next two boats!


Taking advantage of the workshop and the joiner I picked up a nice piece of Western Red Cedar from Minton's before heading over to Santa Cruz and brought along the extra Port Orford Cedar from making the inside stems and we cut some boards to use for making the bow and stern decks. They will have a half inch stripe of PO Cedar between two WRC halves. I will epoxy these together and shape them with the chisel and plane.


I strapped long gunwale pieces back onto the roof racks to bring them home, wrapped in plastic because of all the rain.
I also ordered the seats last week. I went for the plain straight ash seats. There are contoured ones that looked pretty nice, but I decided that someday I might make my own seats so its probably better to just get the standard ones for now - I don't want them to outshine my own handiwork! I ordered from edscanoe.com in New Hampshire. They look pretty nice on the website and they're less than half the price of Bear Mountain Boats' seats. They have a return policy so if I don't like them I can replace them. They should be here in a couple days!

Hot Valentine's Date

I'm a little late on writing down what I've done on the canoe recently. I've had some productive weekends in February though. After my last entry about scraping the inside of the hull I went at it with the 80-grit on the ROS and then sanded it down to a smoother finish with 120-grit paper wrapped around a couple of tightly rolled up magazines. After sanding I wet it down with a damp cloth. Dampening the wood swells the fibres and reveals where more sanding is needed so I repeated this process a couple of times.
With the inside finished it was time to get out the epoxy and fibreglass again. The timing for this activity just happened to coincide with Valentine's Day. Now that Tracy and I have been married for a few years, the traditional fancy meal out has been done so what says "I love you" better than spending a day together with face masks, rubber gloves and toxic chemicals? It's a two person job for sure and Tracy and I have a good system down. She mixes, keeps track of where I am and touches up the spots that I don't have time to get to. We rolled out the glass over the inside and I cut it where I thought it should end. After making the cut though it seemed a couple inches short. I'm not really sure how I did that, but I had little choice but to live with it. The glass isn't supposed to go all the way to the ends anyways and it will be covered by the deck on the one end that it is a couple inches short. I don't think it hurts the integrity of the boat. The inside is a little trickier than the outside because the glass tends to pull away from the hull if you tug on it. I was more aggressive with the squeegeeing this time. I only want to use two coats of epoxy on the inside so it is much more important to eliminate the drips and puddles. For the most part I think it worked out great. I got a little bit zealous with the squeegeeing towards the end and I tugged the cloth a little two much causing some wrinkles. Once this happenned I tried to tug on the cloth diagonally to get rid of the wrinkles and this just caused more. As I was trying to get rid of these the epoxy was starting to set making it more and more difficult. After a while I realised that everything I was doing was just making it worse so I packed it in and crossed my fingers. Now that it is fully set I can certainly see the wrinkles, but the fabric isn't exposed and its not glaring - probably not noticable unless you're looking for it and it will be underneath the stern seat. Well those are my canoe confessions for today. I guess anybody reading this will now know what to look for! :-P

Tuesday, February 10, 2009

Scraping the inside


Work on the canoe has been going pretty slowly in January. I've been running a lot more these days and it takes up time on the weekend. The coming Presidents' Day long weekend should be productive. Tracy has promised to help me with fiberglassing the inside on Saturday, Valentine's Day. Now that is true love! And I've got an appointment with Andy in Santa Cruz on Monday to machine the gunwales. After calling a couple places, I haven't been able to find any Ash or Cherry boards longer than 14 feet so I will have to scarf together a couple to get the full length of the canoe. I'll try to get some from Minton's on Saturday even though they never called me back about getting longer boards. The guy at Jackel in Watsonville was good about getting back to me, but Minton's is less than a mile away.

Since flipping the canoe over I have scraped and sanded the inside. I tried with my cabinet scrapers first, but whether it was my technique or the scrapers, it wasn't getting the job done, especially on the epoxy globs that had seeped through the staple holes. So following the advice of countless people on the Bear Mountain builders' forum I ordered a Pro-Prep scraper. It was much more effective although I still found it difficult to get as nice shavings as I do from a plane. Sharpening the Pro-Prep with my diamond block gave a super-sharp edge for slicing through the epoxy. The image after scraping is above. I have also sanded and it looks a thousand times better now, but I don't have a photo yet.

Sunday, January 11, 2009

The flip


I just checked and my last canoe post was at the beginning of November. I really didn't do much between American Thanksgiving and Christmas. It was kind of a busy time with work and getting ready to go back to Ontario for the holidays. Oh yeah, and I was making my Mom a warping board for her weaving, which took up a couple weekends.

But there is some progress on the canoe to report. After the first layer of fibreglass I added two extra strips of cloth over the bow and stern stems for a little added durability. These blended in fairly well and shouldn't be noticeable once all of the varnish is on. Then I applied two more coats of epoxy - squeegeeing on the first and brushing on the last. Afterwards I waited a couple weeks for it to fully cure and then scraped off all of the drips with a cabinet scraper. As most first-time builders do I think I put on the epoxy too thickly. Oh well, it is better than not putting on enough. It just means more work at this stage with scraping and sanding. I didn't do much else till Tracy and I returned from the holidays at the start of January. The first weekend back I was eager to get to work again and I got through the grueling task of sanding the epoxy smooth. It was grueling mostly because I put on too much epoxy and it was quite uneven in places. With the power sander starting with 80 grit and moving to 120 grit after one pass I leveled and smoothed the surface of the epoxy. This is supposed to be important in achieving a flawless uniform glossy finish at the end. I spent about 6 hours without break sanding. The dust gets everywhere and I didn't feel like cleaning up to eat until it was done. I spent three to four hours the next day cleaning up the mess from all the dust. During sanding I would pause every once in a while to vaccuum off the canoe. I found that a fibreglass canoe and a plastic vaccumm make an excellent static electricity generator! ouch. All in all it turned out pretty well. I sanded down a little too far only a couple places on the edges of the added bow and stern strips. Otherwise, I didn't damage any fibreglass and the weave is mostly invisible.
This weekend I undertook the much more enjoyable task of flipping the canoe over to an upright position. Saturday I cobbled together three padded cradles in the shape of the two #5 stations near the ends and the #0 station in the middle. Then today I enlisted Tracy again to help with the flip. I had to chisel off some extra epoxy that had dripped down to form little puddles around the bow and stern stems in order to separate the canoe from the strongback. The ends of the stems will be cut off eventually anyways so it didn't damage the canoe. I was a little worried that I would have trouble lifting the canoe off of the station molds so I just unscrewed all of the station molds from the strongback first. This seemed to be a great idea until Tracy and I lifted the canoe up and flipped it over. At this point all of the heavy plywood station molds tipped over into the canoe. I was worried that the hull was going to crack, but it just bent a little and held strong. A couple of the tipping molds did leave little dents in the cedar strips on the inside though. D'oh. I think they will mostly sand out.

It was an amazing day here today. Its January and it was about 75deg F (25deg C) and sunny. Perfect for setting the shell out on the strip of grass in front of the house for a photo before returning it to the garage to finish.

Tuesday, December 2, 2008

The Traditional Thanksgiving Road Trip

We seem to have begun a traditon of turkey day road tripping. As we don't own a roasting pan and our families are far away (VERY far away at the moment) it's a good opportunity for a mini-vacation. This year we went to San Diego.
A bizarre scene at the Hotel Del Coronado.


Yep, November in California is rough.


The aviaries at the San Diego Zoo are really great.


Polar Bear Plunge!


Guess this warthog ate too much turkey.

Botanical Garden in Balboa Park.

After a 9-hour drive on Thursday including a hellish slog through LA, we got to San Diego in time to stroll through Balboa Park as the sun went down. After that we went in search of a Thanksgiving feast. Unfortunately "Little Italy" was officially closed so we headed downtown. We found a nice hotel restaurant that was open and had waldorf salad, squash soup, salmon, and pecan pie. Mmmmm.

On Friday after a run in the park, we met our friend Rich at the Zoo. The place is so huge, I don't know how you could see everything in one day! We did our best not to get run down by a zoo-mobile. I knew the visit was complete once I'd spent $0.50 to destroy a penny in the name of the ultimate cheesy souvenir. I think I already lost it.

After the zoo we drove over to Coronado Island to check out the Hotel Del (I can call it that since I've been to San Diego once or twice before in the company of a local.). Then we tried Little Italy again and this time the neighborhood was officially open. We had pizza and beer at Filippi's Pizza Grotto. The line was down the block! But we waited for the chance to dine under hundreds of chianti bottles hanging from the ceiling. Guess you don't see THAT just anywhere.

For our last day we decided to take in some history. We saw the official start of the El Camino Real which runs right past our house all the way up here. It starts where Padre Junipero Serra founded the Mission of San Diego de Alcala in San Diego. Not that thrilling. Also hit Cabrillo National Monument at Point Loma and Old Town San Diego. There are some museums there with quite a lot of interesting objects and information if you can get past the cheesy junk shops and hordes of people. We did a little frontier-style gambling, talked to a coffin-maker, and sent morse-code messages at the Wells Fargo museum. FUN! We topped it off with a visit to the Karl Strauss brewery and the new James Bond movie downtown.

Hoping to avoid a traffic debacle on the way home, we took an alternate route that looped around Edwards Air Force Base (check your google map) and were close to seeing the Space Shuttle landing there, but the timing wasn't quite right. A mere 9 hours later we were home!

I'm thankful that you're still reading, but this is the end.